

My Specialized Rockhopper SL Pro mountain bike is over 5 years old now, I try to look after it as much as I can and during this time it has had several chains, cassettes, bottom brackets and brake pads fitted and early on this year I replaced the chain rings. Recently however I have been having problems with the rear wheel, the freehub has been sticking and the cassette which sits on the freehub seems to be moving slightly, causing the gears to slip in certain positions …….so the time has come to get some new wheels…..
Selecting wheels from bike websites has become more complicated in recent years. Traditionally mountain bike wheels were all 26 inch diameter but then came the introduction of 29 inch wheels and then the intermediate size of 27.5 inches. Also the axle sizes can vary from the traditional quick release skewers to various bolt through designs. My bike uses traditional 26 inch wheels with normal quick release skewers.

Yellow rim tape
A further variable to consider is the type of mountain bike riding you do. Is it predominately cross-country? trails? enduro type riding? or downhill? This will determine what type of rim you need on the wheel with stronger normally meaning heavier. Armed with this information I had a look at Merlin Cycles website where I get a lot of my spares from, the prices are good and the customer service spot on too. They do a hand-built wheel service where you can specify the components you want. I chose Hope Pro 2 Evo hubs, ZTR Arch EX rims and DT Competition stainless steel spokes. Also ordered some new brake rotors and some Hope quick release skewers.
The rims I bought can take the usual inner tube and tyre combination but the rims are designed with a tubeless setup in mind. I have been curious about this for a while so decided to set the wheels up tubeless. With these rims all you need is some Stans Yellow Tape around the rim, this tape is airtight and seals the holes where the spokes are, you also need a tubeless type valve which has a screw out core and a bottle of Stans Tyre Sealant. I also bought a syringe to inject the sealant in the tyre, this came in very handy later.

Tubeless Valve
I have used Panaracer Fire XC Pro tyres for a few years now and find them an excellent tyre, however I had an extremely hard job getting the beads of this tyre to fit over the rims, I was seriously worried about damaging the rims with the tyre levers, I’m not sure how I will ever get them off to be honest! Anyhow, once I got my strength back I inflated the tyres (without the sealant) to see how things were looking. A good tip here is to brush some soapy water over the tyre edge and wheel rim, this greatly helps everything slide into place and once I got the tyre approaching 40 psi the tyres explosively locked into the rims. The soapy water also highlights how porous the tyre walls are too, with lots of bubbles forming all the way round the tyre walls where air was escaping from. To seal the tyre walls you need sealant, so I let the tyres down and screwed the core out of the valves and used the syringe to inject about 3 fluid ounces of sealant into the tyre. some people just take one side of the tyre off and pour sealant in but with the struggle I had getting them on I was very pleased that I bought the syringe. Once the sealant is in the tyre I screwed the valve core back in and brushed the rim and tyre bead with soapy water again and pumped the tyres up, again as they approached 40 psi they banged into place. Next you need to shake the wheel and rotate it to coat the inside of the tyre with sealant to stop it leaking air, then leave it on its side for ten or fifteen minutes, then turn it over and do the same. The secondary job of the sealant is to seal any punctures you may get in the future. A video showing Stan Koziatek, the inventor of the tubeless system, demonstrating what happens when you get a puncture can be found here.
The next day I was relieved to find that the tyres were still hard so they must have sealed ok, so I screwed on the new brake rotors and fitted the new skewers and placed the wheels in the bike, disappointingly this revealed another problem. The new brake rotors being slightly thicker than the old ones were rubbing on the brake pads, so with the bike upside down I removed the brake pads and gently with a large bladed screwdriver tried to lever the brake pistons back into their housing, I may have pressed the brake lever with the bike upside down and I think this has put some air in the hydraulic system, the result is the front brake went very soft …. It needed a bleed to get rid of the air. With Avid type brakes this involves a couple of syringes and some Dot Fluid, stuff I don’t have so the local bike shop had to do this job for me.
Finally, a great source of information about tubeless tyres and some very useful videos can be found on Stans NoTubes website.
-

- Hope Pro 2 Evo rear hub
-
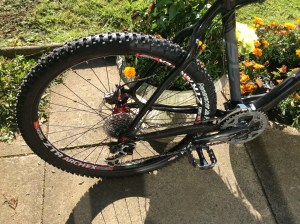
- Rear wheel and hub
-
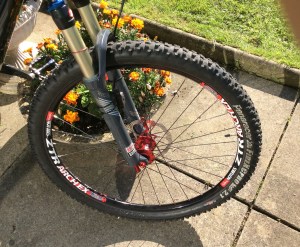
- Front wheel with Hope Pro 2 Evo hub
-
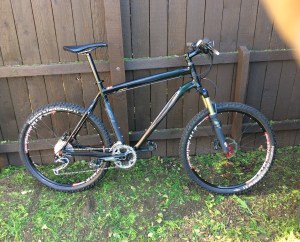
- New wheels fitted
-
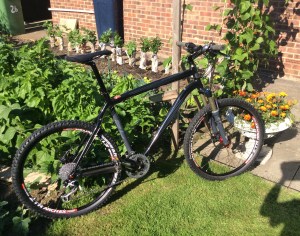
- The finished job
